


Hello lovelies!
I'm going to show you how to decorate an MDF Tool Caddy.


Product's I've used are of course from my favourite shop
Product List...
MDF Tool Caddy ~ Americana Decor Chalk Paint Primitive ~ Craft Consortium Decoupage Paper White Crack Texture and Wild Meadow ~ Cosmic Shimmer Matt Glue, Seal & Glaze ~ Americana Decor Ultra - Matte Varnish ~ Cosmic Shimmer Colour Cloud Ink Decadent Oak ~ Cosmic Shimmer Acrylic Glue ~ Cosmic Shimmer PVA Dark Bronze ~ Ornate Pearl Sticker ~ Flowers ~ Flowers Linen Cotton Ribbon ~ Collall 3D Glue Gel
Already in my crafty stash...
Create Quote ~ Ecoline White Paint ~ Rigger Brush ~ Tim Holtz Findings Memory Key
Step By Steps...
1. Paint the inside of the two end panels, making sure you paint the edges. Paint the inside of the front & back panel, make sure you don't paint the tabs. Paint the edges of these and the edges of the middle section. Leave to dry.
* I've left the base of the Tool Caddy unpainted. If you like to be a frugal crafter you will understand why. There is no point wasting paint on the bottom when you won't even see it. On the other hand, if I was giving this as a gift, then I would paint the bottom!*


2. When the paint is dry, paint over all the pieces with the Ultra-Matte Varnish. Leave to dry.

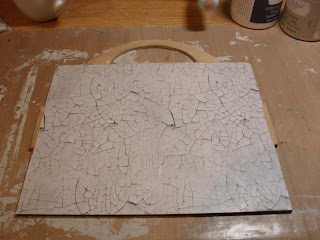
3. Paint the Matt Glue, Seal & Glaze onto oneside of the MDF centre panel. Tear a square of the crackle paper to fit the panel, leaving the tabs. Press onto the MDF, then sand away the edges. Paint over the matt seal glue and leave to dry. Repeat the same with the other side. Leave the glue to dry.
4. Use a sponge to apply the colour cloud to the handle and rub over the crackle paper.

5. Put the caddy together. Then paint glue over the joins to secure everything together.


6. Lay the caddy on it's side. Use the rigger brush, dip into the white ecoline, then tap the brush over the handle. This is really random, the little paint splatters will go on other parts of your caddy, but I quite like this. It's arty! Do the same on the other side, then leave to dry.


7. Tear two pieces of the Wild Meadow Decoupage paper big enough to fit the outer panels and the front and back panel. Lay the paper on the front and back panels before applying glue and use a craft knife to trim to size. Now cover the panels using the Matt Glue, Seal & Glaze. Smooth over the paper, sand away the excess paper and cover with another layer of the glue seal then leave to dry.


8. Carefully paint the Dark Bronze PVA at the bottom edges to finish off the panels. Use a fine brush and paint swirl lines along the edges of the sides.


9. Apply the ornate pearl sticker to the panel you want to be the front of the caddy.

10. Tie the cotton ribbon to the handle and tie a bow. Glue the Create Quote to the opposite side of the bow. Use a length of ribbon to thread through the key. Attach just below the bow at the front. Tie another bow at the back of the caddy. I know the key says 'memory' but I like it for this. Finish off by gluing the flowers on to the caddy. Finally fill the caddy with your tools!


I think the Tool Caddy looks very pretty sat on my desk!

I hope you have enjoyed my tutorial today.
Happy Crafting,
Lot's of love
Nicola
XXX
LINKS YOU NEED TO KNOW


No comments:
Post a Comment