Hello everyone and welcome to this month's crafty tips. This month I am showing you a tutorial on how to alter a mirror.
Materials you will need are (if you don't have exactly the same, don't worry just use what you already have in your crafty stash).
Mirror (mine is from a swedish store you will all know)/Distress inks - Vintage photo, Walnut stain, Tea-dye and Rusty hinge/4 small sponges/Crackle accents/Pearl Ex powder Antique Copper/small spoon & dish/Paint brush/seed beads/Glossy accents/Lace circle or doily/piece of lace/Pinflair glue/selection of flowers/vintage looking ornate buttons and beads/scrap of watercolour paper/piece of kraft card/Embossing folder and machine/Crafter's Companion Spray & Sparkle in Gold/Hampton Art stamp - Home is where your heart lives/Lavinia stamps - Toadstool houses & fairies/ Memento Rich cocoa ink pad/4 small paint brushes/Distress stickles - antique linen,vintage photo,frayed burlap, clear rock candy.
Time to make: around 2-3 hours....this excludes drying time!
Step 1
Using your distress inks and sponges, randomly rub all over the frame. You do not need to sand this one for a key as it is already a matt surface that will hold the colour. Make sure you get inside the edge where the mirror part is too, and the outer edges. This is very random, alternate colours as you go along. Apply until you have the depth of colour you want to achieve.
Build up the colour until you are happy with the result.
Step 2
Pour enough Crackle accents in a dish to paint the frame.
Using a small spoon, add a small amount of the Pearl Ex powder to the dish. Mix well with the brush.
Now use this mixture to paint the whole frame.
Set aside to dry.
Step 3
Meanwhile, ink your lace circle or doily and also the flowers.
Step 4
Stamp the fairies, toadstool houses and text stamp onto the watercolour paper using the Memento ink.
Dab each colour Distress ink onto your craft sheet.
Spritz lightly with water.
Using your selection of paint brushes pick up the colour from your craft sheet and paint the stamped images.
Set aside to dry.
Step 5
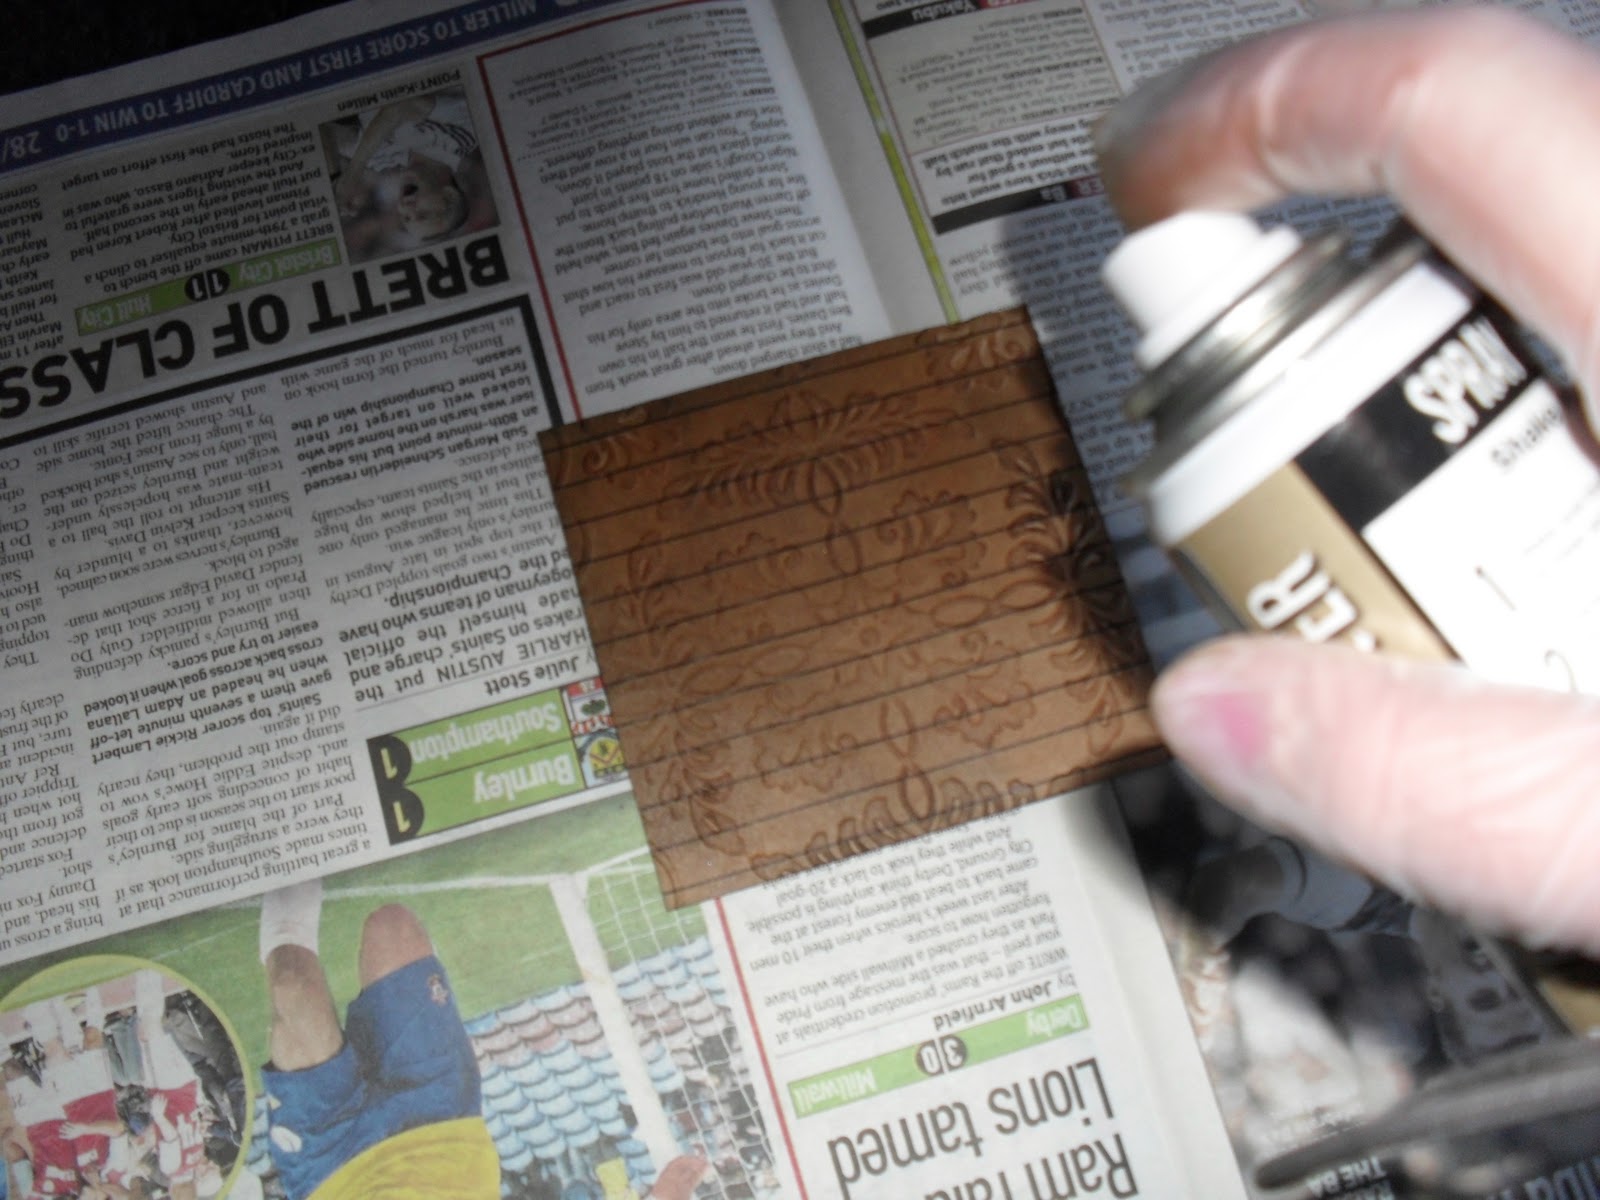
Cut your Kraft card to fit the centre square.
Emboss the card using your folder and embossing machine.
Ink using your sponges.
Spray with the gold spray.
Step 6
Apply Glossy accents to the bottom left hand corner. Sprinkle with seed beads and set aside to dry.
Step 7
When dry attach your Kraft card to the centre using Pinflair glue.
Step 8
Using the Pinflair, glue the lace circle and your piece of lace, the flower, ornate buttons and beads to the frame.
Set aside to dry.
Step 9
Take your stamped images and carefully tear around the houses and the text.
Ink the edges.
Use a small pair of scissors and cut round the fairies leaving a small border.
Ink the edges.
Step 10
Attach the houses to the centre of the mirror using Pinflair.
Add the text and the fairies and embellish with flower and beads.
Decorate with the Distress stickles.
Set aside to dry.
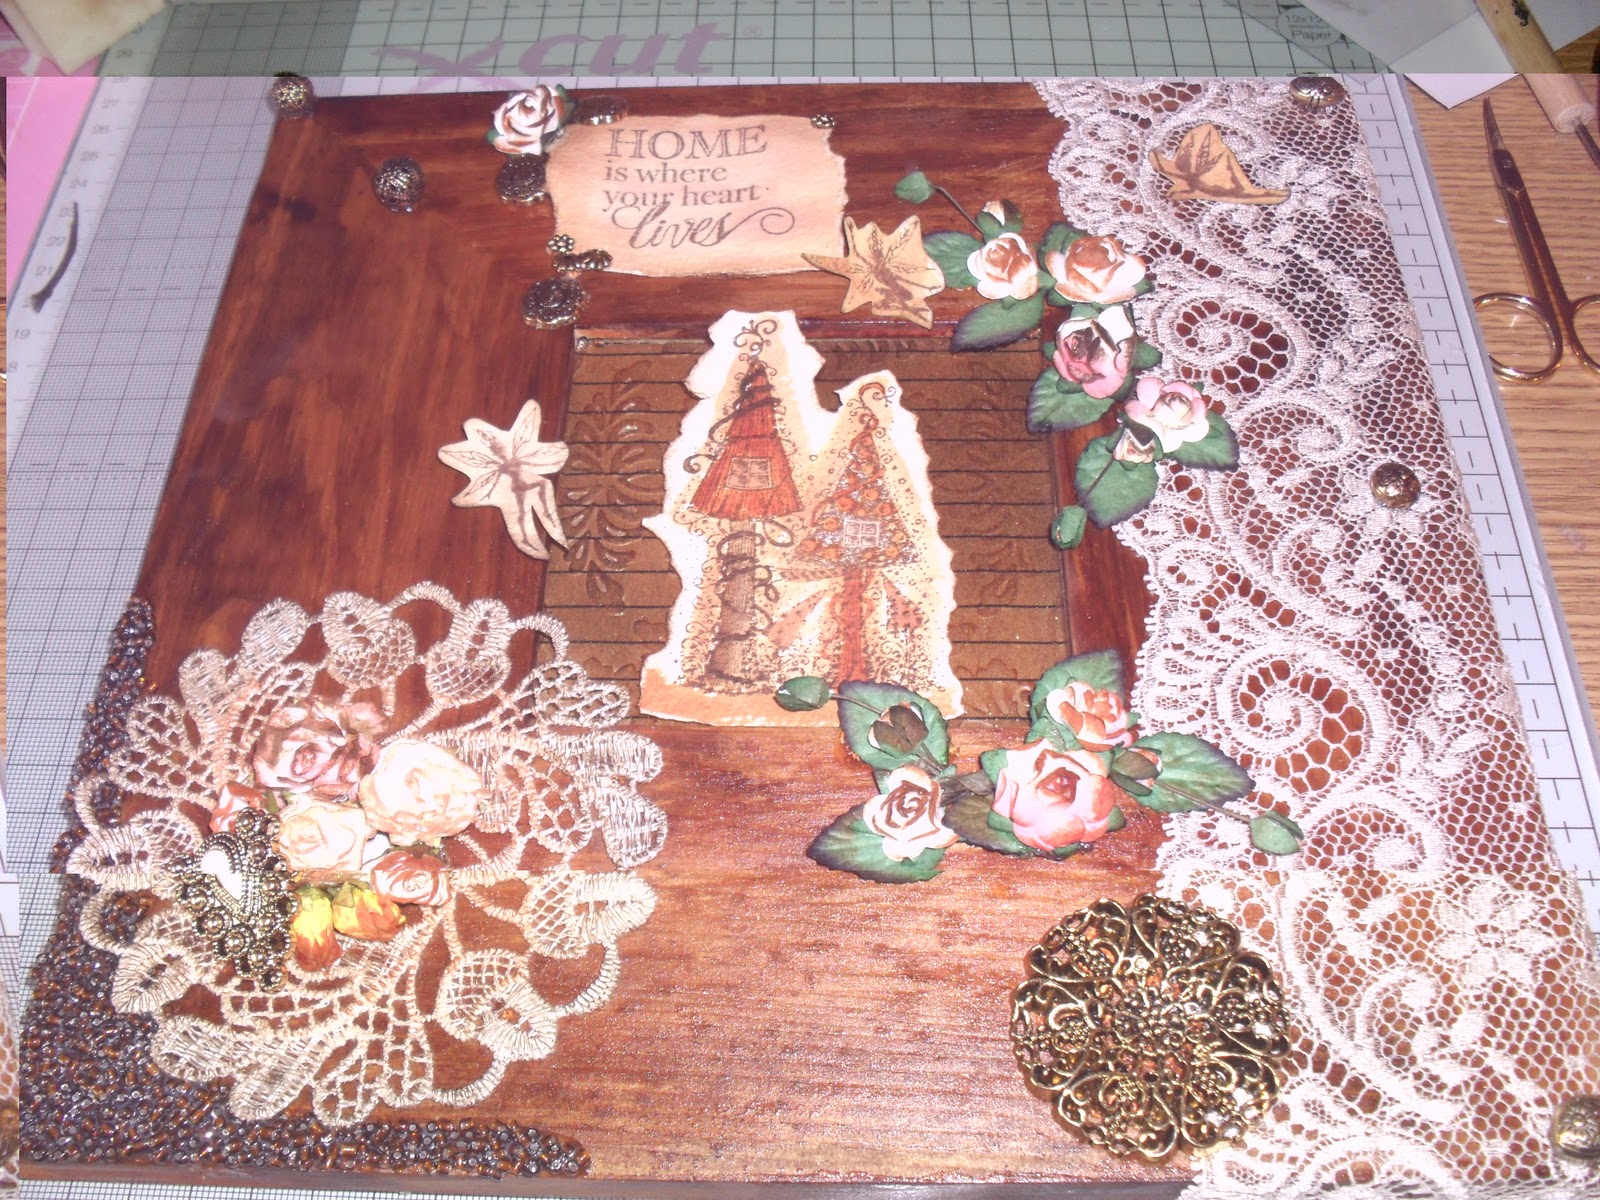
Finally here is your finished Altered Art Mirror
I will be hanging mine on my craft room wall. Thank you so much for taking the time to look at my tutorial for this month. I hope you have enjoyed reading, as much as I enjoyed making it and showing you how. I hope you enjoy making your own mirror.
Till next month,
Have fun and happy crafting,
lots of love NJ XXX