Hello lovelies!
I have made a project especially to enter into the challenge over at the
The theme is 'Alter Something'.
So, I have made a wall hanging using beer mat's. I've created a tutorial too, to show you how I made it. I also wanted to make my project technique based, so I chose seven techniques to show you.
My wall hanging
I've broken the ingredients list down into segments, as this is the pile altogether.
So, here we go!
Ingredient's to prepare the beer mat's...
Beer mat's x 7, craft knife, sanding file, small brush, decorative paper, cosmic shimmer acrylic glue, ruler, pencil, cropadile big bite, heat resistant craft sheet, paper towel.
Method...
Peel the blue design away from the beer mat's very carefully using your craft knife.
Use the file to sand away the loose fibres. The mats won't be smooth, but I think this just adds to the texture of the project. Use a small brush to brush away the dust.
The backs of the mats do not need to be peeled.
I have covered them with decorative paper. Cut paper to size first, then glue in place.
On each mat, measure 1cm from the top and 2cms in. Mark with pencil.
Where the pencil markings are, punch holes size 3/16.
Now the preparation is complete, the next part is the techniques to make the backgrounds.
Technique 1 - Stippling Method
Ingredients - card stock, acrylic paints Raspberry Wine, Raspberry Sherbert, Rose Garden, Metallic Bronze, Live Laugh Love Stencil from That Craft Place.
Add paint using the stippling brush by pouncing the brush up and down on the mat. Dab excess paint off on the paper towel.
Move the torn card down, then use two more contrasting colours and stipple.
Alternate your layers until the mat is covered. Leave to dry.
When dry, lay your live laugh love stencil over the mat. Positioning the LOVE at the bottom.
Use the metallic bronze to stipple over the love word, set aside to dry.
Technique 2 - Direct to Paper
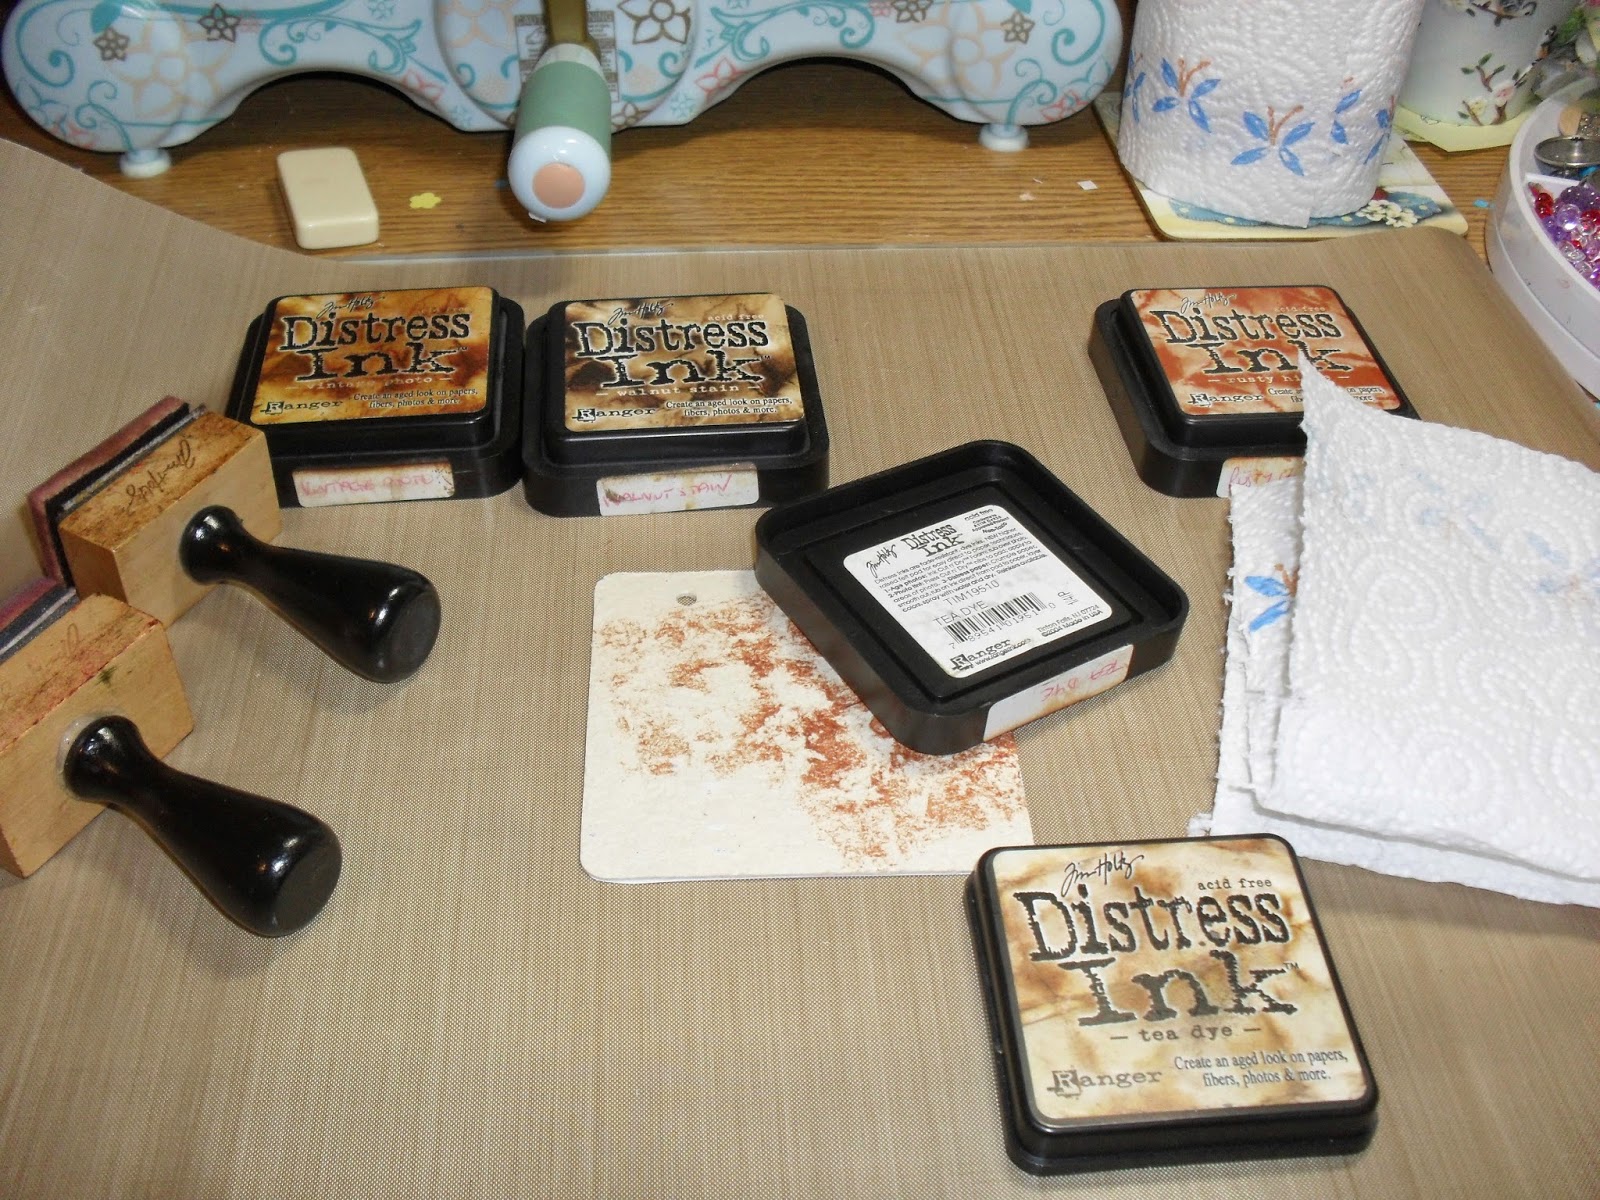
Ingredients - Tim Holtz Distress Inks - Vintage Photo, Walnut Stain, Tea Dye, Rusty Hinge, ink applicators, paper towel.
Start with the lightest colour and apply by tapping or dragging the ink pad directly to the mat.
Continue layering the colours, working from light to dark. Also use ink applicators to apply in random areas. Use the paper towel to rub lightly over the surface to blend the effects. Leave to one side.
Technique 3 - Sea Sponge Technique
Ingredients - Acrylic paints Rose Garden, Raspberry Sherbert, Bronze, Antique Gold, sea sponge, spray bottle, Pearl Ex pigment powders Sparkling Copper, Sparkle Gold, Antique Copper, Super Copper, heatgun, perfect pearls brushes, heart stencil from That Craft Place.
Spray sponge with water. Sponge the paints onto the mat, in a dabbing motion.
Use heat gun to speed up drying time. Use your brushes to dab the powders randomly onto the mat.
Use a clean piece of sponge, spray lightly with water, dab over the pearl powders. Dry with heat gun.
Lay the heart stencil over part of the mat.
Sponge over with Antique Gold paint. Set aside to dry.
Technique 4 - Sanding
Ingredients - Gesso, Acrylic paints Coffee bean, Maroon, Huckleberry, paint brush, sanding files.
Paint the mat with Gesso. Dry with heat gun.
Sand the edges.
Apply acrylic paints with brush. Dry with heat gun. Sand around the edges and in the middle.
Apply another layer of paints.
Dry with heat gun. Sand roughly all over and around the edges. Leave to one side.
Technique 5 - Tea Dyeing
Ingredients - 10 teabags, 250ml boiling water, brush, heat gun, Tim Holtz Collection Bubble Stencil, Tim Holtz Vintage Photo Distress Ink.
Put the teabags in the boiling water. Leave until the water is room temperature.
Remove the teabags before using. Brush the tea dye over the mat. Dry with heat gun.
Paint a few more times, drying each layer with heat gun, until your happy with result.
Lay the bubble stencil over half the mat, use the Vintage Photo ink and apply with an applicator.
Leave to one side.
Technique 6 - White Glue Crackle
Ingredients - White glue (pva) , acrylic paints Raspberry Sherbert, Antique Gold, brush.
Paint the mat with a thin layer of glue. Let dry until tacky.
When tacky paint with the two colours.
Now leave this to dry naturally.
Soft crackle effect.
Technique 7 - Peeled Paint
Ingredients - Bristol Board, acrylic paints Coffee Bean, Rose Garden, Petroleum Jelly, paper towel, brush.
Cut a piece of Bristol Board to fit the mat. Mark the holes and punch. Glue to the mat.
Paint with the Coffee Bean. Allow to dry.
Add petroleum jelly randomly, using your fingers.
Paint the Rose Garden over the mat. Let dry.
Use a paper towel to rub the paint off the jelly.
The finished backgrounds.
Time to embellish...
Ingredients - Stamps - Home is Where Your Heart Lives by Hampton Art, Dream by Inkadinkado, Butterfly Collage by Hampton Art, Hearts and script by Anita's, Stazon Inks Rusty Brown and Timber Brown, 3 dominoes, Alcohol Blending Solution, alcohol inks Butterscotch, Caramel, Cranberry, Ginger, Red Pepper, Copper Mixative, Blending tool and felts,
Crafter's Companion Words of Wonders stamp sets 1 & 2, Tim Holtz Distress Stickles Antique Linen, Vintage Photo, Frayed Burlap, Love Key and Heart Key from Tim Holtz finding, Various metal findings.
Method...
Use the alcohol inks to create coloured backgrounds on the domino's. This is a very random technique. Leave to dry.
When dry use the dream, butterfly and hearts stamp using the Stazon inks over the domino's.
Stamp the Home is where my heart lives stamp on the first mat.
Use some of the word stamps on the mats and embellish with the domino's and findings, using glue to fix everything in place. Leave to dry.
When dry, thread brown satin ribbon through the holes to create the wall hanging.
I have really enjoyed making this project. I hope you have enjoyed reading how I made this. It is now hanging in my craft room.
I am entering this into the
with the theme
'Alter Something'.
Thank you so much for taking the time to read my tutorial. I really appreciate your visit.
Have fun and happy crafting,
lots of love
Nicola
XXX