PLEASE 'LIKE' MY PAGE ON FACEBOOK - THANK YOU

Showing posts with label Texture Paint. Show all posts

Sunday, 2 August 2015

That Craft Place Challenge - Mixed Media...A Little Bit Of Love...

Hello lovelies and welcome to my blog, I hope you enjoy your visit today!

It's time for another great challenge over at 


The challenge theme is

'MIXED MEDIA - ANYTHING GOES'.

The perfect opportunity to get all inky and messy!

I have used an MDF heart for my project from 


I love using MDF pieces, the quality from That Craft Place is just amazing. I love also how you can take a plain shape and turn it into something beautiful!


So, here is a list of the fab goodies I used...

Available from That Craft Place 

MDF Heart, 3 small MDF hearts, MDF Love banner, MDF Love tag, Gesso, Texure Paste, Stencils, Cosmic Shimmer Crackle Paints in shades Jade Mint & Heather, Distress Inks in shades Cracked Pistachio & Shaded Lilac, Cosmic Shimmer Embossing Powder Ancient Copper, Cosmic Shimmer Acrylic Glue

From my own crafty stash

Metallic Gilding Wax in shades Patina & Vintage Plum, Distress Embossing Ink, Mica Flakes, Various embellishment's..I've used a metal heart charm, Prima flowers, string, pearl string, and 3 purple flowers that I made for a previous project using UTEE and a mould, Sakura gelly roll pen, Pearl Ex Pigment Powders in shades Sparkling Copper, Antique Copper, Duo Green Yellow, Spring Green. 

Paint the MDF pieces with Gesso, leave to dry.


Use the texture paste with the stencils over the heart. Leave to dry.


Use the small diamonds stencil with the texure paste over the small hearts. Leave to dry.


Paint the larger heart and banner with Jade Mint, wipe excess paint off the word LOVE with a cotton bud. Paint the other pieces off MDF with Heather paint. Leave to dry thoroughly until the cracks appear.


Use a sponge to blend Cracked Pistachio onto the larger heart and banner. Use the same technique with the Shaded Lilac on the small hearts and tag. This will show off the cracks even more.


Randomly rub the gilding waxes over the heart and other pieces. Use kitchen roll to buff the waxes.


Dab the embossing ink over areas of the MDF pieces, sprinkle over the embossing powder and heat until melted.


Apply glue to areas of each of the MDF pieces, then sprinkle over the Mica Flakes. Press into the glue and leave to dry.


Thread the tag, banner and heart with string and pearl string. Glue the banner and tag into postition. Use the gelly roll pen and go over the LOVE word. Glue a Prima flower at the end of the banner and use an embellishment in the middle. Thread the heart charm with string and pearls and glue into place. Glue the UTEE flowers and hearts as shown.


Add the powders into 4 ink sprayers and carefully spray random areas of the heart to create a slight shimmer. Then use a small brush to pick up the Pigment powders and use at the bottom of the heart and around the top edges. Use a larger brush to lightly brush away excess powder.


Finally, here you have your finished result!


I hope you have enjoyed my tutorial on how to create this beautiful mixed media altered heart.

Hop over to the challenge over at 


to see lot's of gorgeous design team inspiration!

Have fun creating,
lots of love Nicola 
XXX


Sunday, 24 May 2015

That Craft Place DT Project...Mixed Media

Hello lovelies!

I am so excited to be showing you my first design team project for 


The challenge theme this time is

'Shabby Chic'.

I have been chosen to be part of the Mixed Media team. I love to get all painty, inky and very messy! 

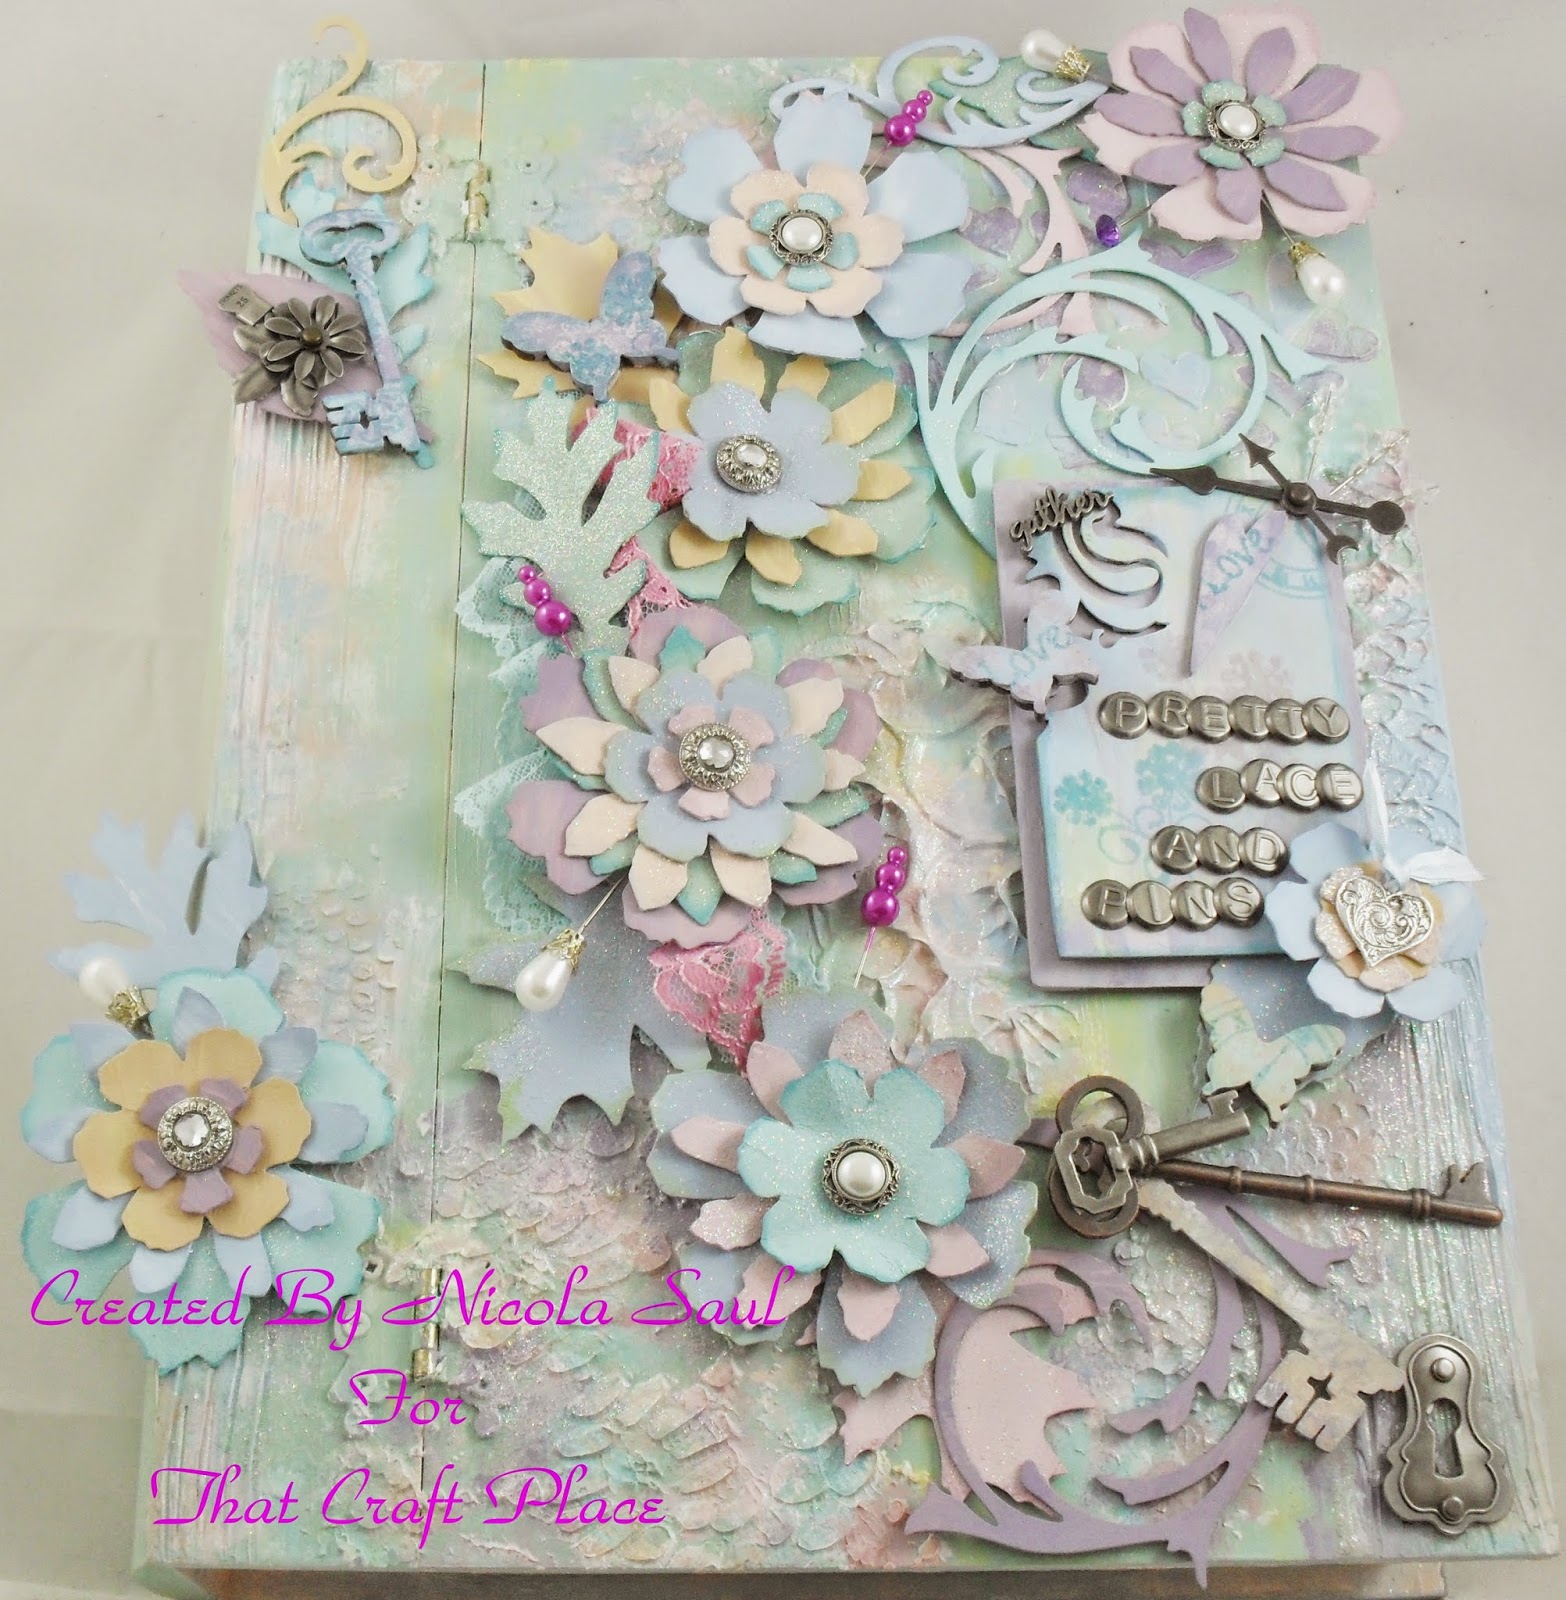
For my 'Shabby Chic' Mixed Media project, I wanted to show you a tutorial too. I thought it would be nice for you to see how I created my lovely box to store

'Pretty Lace and Pins'


I started with this MDF box, which I already had in my crafty stash.


The lovely items I used to create this are as follows...


Hearts Stencil, Greyboard ornate panel, MDF butterflies, Greyboard Keys, Betty Boots Clear Stamp Set, Cosmic Shimmer Acrylic Glue.

Items which I already had in my crafty stash...

Gesso, Texture Paste, Sea sponges, 6 Spatulas, Scrap lace panel, Sequin waste, Fork, Skewer, Shotcup, Spoon,
Acrylic Paints in shades - Mint Green, Victorian Rose, Baby Blue, Light Blue, Purple Lilac, Jamaican Sea, Sunflower, Ballet Pink, Spring Rose, Skintone, Titanium White, 
Ranger Crackle Accents, Deco Art Glamour Dust, Distress Inks Squeezed Lemonade, Shaded Lilac, Peacock Feathers, Victorian Velvet, Tim Holtz Grunge paper, Tim Holtz Sizzix Dies Elegant Flourishes, Tattered Floral, Tattered Leaves, Ornate buttons, Heart Charm, Blue Ribbon, Letter Brads, 'Gather' metal charm, lock & 2 brads, Clock hands & 1 brad, Pins, Trinket Finding, Metal Flowers, Lace, Linen, K & Company Metal Art Keys. 

Step by Steps...

Paint the box inside and out with Gesso. I gave it two coats.


Paint the spatulas with Gesso.


Paint the outside of the box Mint Green. Edges and inside the lid with Victorian Rose. Inside base with Baby Blue. Leave to dry.


Apply Texture paste by painting over the materials. Use the fork, spoon, skewer and shotcup to create patterns in the paste. Leave to dry.


Paint the greyboard pieces and mdf butteflies with Gesso, Leave to dry.


Paint the spatulas with Mint Green, Victorian Rose and Baby Blue. Leave to dry.


Paint the stencilled hearts, greyboard pieces and mdf butterflies using Light Blue & Purple Lilac paints.


Use seasponges and brushes to dab and brush the paints over the box. This is a very random technique. Work until you've acheived the result you like. Leave to dry.


Paint the Crackle Glaze over the front of the box. While wet, sprinkle the Glamour Dust in random areas. Leave to dry. This could take between 1 - 4 hours. 


Use the seasponges and brushes to paint the spatulas, greyboard and mdf as before. Use the distress inks around the edges. 


Stamp over the greyboard, mdf and spatulas using the Betty Boots stamp set and Distress Inks.


Die cut the flowers, leaves and flourishes from the grunge paper. Paint some of them in two tone colours, and some of them plain colours with a sprinkling of Glamour Dust while they are wet. Leave to dry.


When dry ink the edges with Distress Inks.


Shape the flowers and glue together. Add the ornate buttons to the center of six flowers, and the heart charm and ribbon to one flower center.


Add the brads to the decorative greyboard to spell out
'Pretty Lace And Pins'. Glue this to the base. Add the heart over lapping the stamped watch face. Secure the gather word to the opposite corner.


Glue a piece of linen onto the inside of the box, for the pins. Fill with pretty lace.


Glue the decorated spatulas around the sides of the box.


Finally, embellish the front with the flowers, lace, locks and keys and other findings.


I absolutely loved decorating this box. I love the Shabby Chic colours. It's amazing what household items you can use in Mixed Media work to create texture. 

Don't forget to hop over to 


to see the wonderful creations from the rest of the design team.

We would love to see your entries for this challenge.

I hope you have enjoyed my tutorial. Thanks for visiting.

Have fun and happy crafting,
lots of love
Nicola
XXX