PLEASE 'LIKE' MY PAGE ON FACEBOOK - THANK YOU

Showing posts with label Glitter Geeks DT Projects. Show all posts

Friday, 13 April 2012

My Glitter Geeks DT Card........

Hello lovelies,

it's time for another challenge at the

'Nautical' theme

For my card I used Serif Craft Artist and some stamps I had in my crafty stash.


So dig out your nautical crafty stash, we would love to see your creations at the Glitter Geeks this week!

Have fun and happy crafting,
lots of love
NJ XXX

Friday, 6 April 2012

My Design Team Card for Glitter Geeks...

Hello lovelies,

Wow Friday soon comes around!

Today is Good Friday so what better theme to have for the


challenge than 'Easter'.

I have made my card using the


I wanted my card to be for an 'Easter' Birthday so I think the bunny on the flower is just right for this!


I have used glossy accents and dew drops on the petals. I hope you like this card.

I look forward to seeing your creations for the Easter Challenge at the Glitter Geeks.

Happy Easter to you all,
have fun and happy crafting,
lots of love
NJ XXX


Friday, 30 March 2012

My DT Card for Glitter Geeks this week.......

Hello lovelies,

well its that time of the year when April Fool's Day is approaching.

This weeks Glitter Geeks theme is of course...

April Fool's Day...so we want to see those humorous cards!

For my card I have used

'Smirk'....I think these are quite funny!


So lets see your humorous creations over at the


Have fun and happy crafting,
lots of love
NJ XXX


Friday, 16 March 2012

My DT Card for Glitter Geeks this week.......

Hello lovelies,

we have another great challenge over at the


The theme this week is Mother's Day and is sponsored by

Jelly Park.

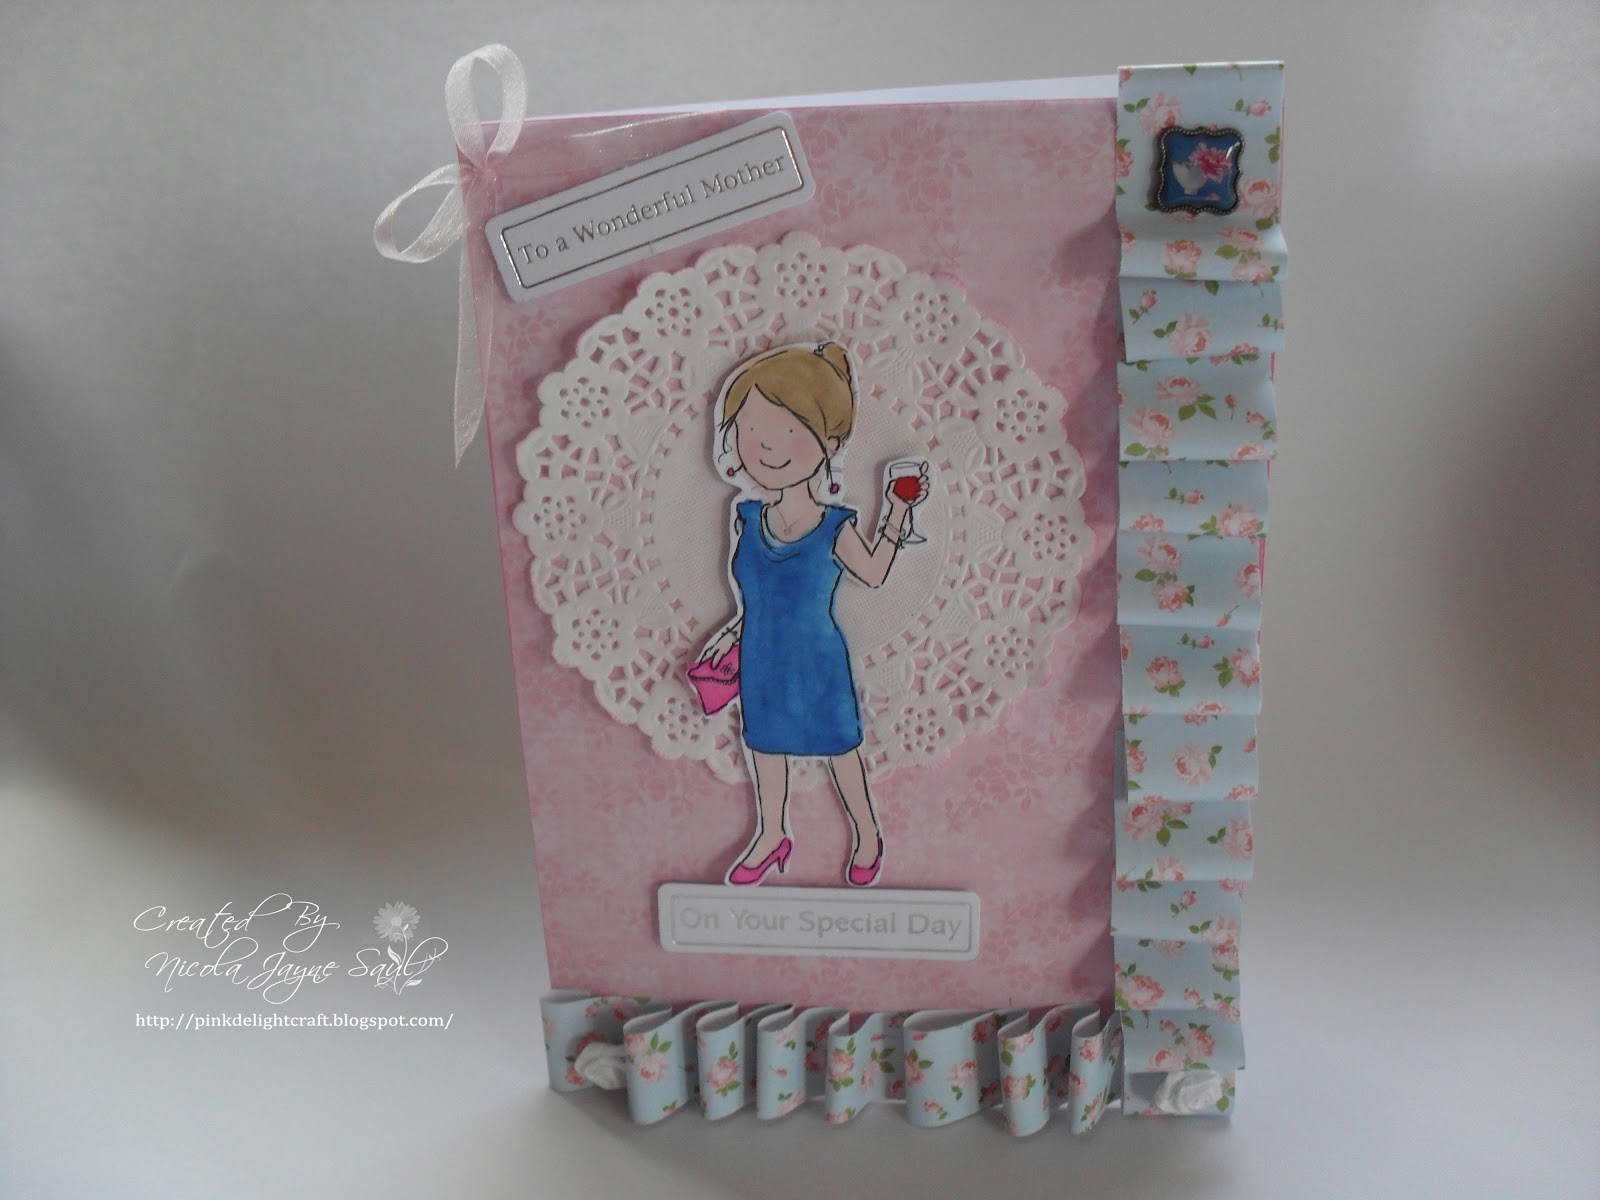
Here is my card for this week, I have coloured the digi image with my Letraset Flexmarkers.
At the moment I really love paper pleating so I have used this technique on this card.


I would love to see your Mother's Day creations so don't forget to
add your entries over at the
Glitter Geeks.

Have fun and happy crafting,
lots of love
NJ XXX


Friday, 9 March 2012

DT Card for Glitter Geeks Challenge this week............

Hello lovelies,

I'm a bit late posting my Glitter Geeks  DT card for this weeks challenge!

Its a great theme

Spring Is In The Air


We are sponsored this week by Bugaboo stamps


Heres my card .....


I've coloured the image with my flexmarkers and used a butterfly border punch to decorate the edge. I then inked with distress inks.

I love these colours together!

Thanks for looking and I would love to see your Spring creations for this challenge.

Have fun and happy crafting
lots of love
NJ XXX


Friday, 2 March 2012

Glitter Geeks DT Card this weeks challenge.....

Good morning my lovelies,

wow time is flying by and here we are again. Another Friday another challenge over at the


The theme this week is

Song Titles

for my card I have chosen

Robbie Williams - Angels


Ingredients used...

A5 card blank/First Edition 12x12 Spring Feast paper pad/Inkadinkado clear stamp set Angels/Memento Tuxedo Black ink pad/Sakura gelly roll pens/Self-adhesive clear gems/ribbons/pearl strand/pearl pins/Stickles Glitter Glue Glam Pink.

How I made this card.....

Round the two bottom corners of the card blank. I covered the base with the pink embossed and shimmery decorative paper from the pack. Stamped the angels onto white card, coloured with the pens, cut out and attached with foam pads.
Stamped 'Angel' onto card, added an 'S' with the pens. Cut this out, rounded the two bottom corners and used the stickles around the edges.
Punched holes along the bottom edge and thread the ribbons and pearls through.
Make a bow using the ribbons and pearls and attach to the base as shown and finish with the pearl pins.

I wanted my card to be sparkly and the angels to be sparkly too as I think they are special!

I would love to see your creations for this fab theme,
hop over and have a peek at what the rest of the design team have created


Have fun and happy crafting,
lots of love
NJ XXX


Friday, 24 February 2012

My DT Card for Glitter Geeks this week.......

Hello lovely crafter's,

it's time for another challenge over at the


The theme this week is

St.David's Day


I have made this card using Serif Craft Artist Platinum Edition. I printed my chosen layout twice.
I cut a square of decorative paper from the First Edition 12x12 Spring Feast paper pack inked the edges using Tim Holtz distress ink peeled paint. I then matted onto a kraft 8x8 card blank.
I cut one layout to size, inked the edges and matted to the base. I then cut the petals away from the daffodil on the second layout so I could decoupage them as shown.
To embellish I used yellow grosgrain ribbon and made a knot, added self adhesive dew drops, and used Sakura gelly roll clear star pen around the daffodils just to add a bit of shimmer.

I would love to see your entries for this theme,
don't forget to hop over to the


and see what the rest of the design team have made,

have fun and happy crafting,
lots of love
NJ XXX


Friday, 17 February 2012

Glitter Geeks DT Card for this weeks challenge .....

Hello everyone,
yes it's Friday...so that means another challenge
over at the


This weeks challenge theme is
'Girls and Boys'
and is sponsored by


I hope you like my card I have made for this challenge...


I had an idea as soon as I knew the theme. I have made this card by combining images, backing papers and a greeting from Polkadoodles Pretty Tuff CD and an image, backing paper and greeting from Polkadoodles Pretty Sweet - Mini Collection CD

I have made a side step card. Covered with backing papers. Fussy cut around the images, sentiments, hearts and skate board. Inked around the edges with Tim Holtz Distress Ink Vintage Photo.

Attached a length of ribbon down the left side of the green flower backing paper and stuck to the base card, added a bow.

I used foam pads to attach everything else to the card. To finish I have embellished the flowers in the basket with adhesive dew drops and added adhesive pearls to the card as shown.

I wanted this card to depict young love...the boy is stood quite casually thinking of his girl, hence the love heart above him. The girl is stood thinking of him with the hearts floating from her mind.
The boy is saying 'Hi' to her and the sentiment 'Thinking of You' means for this card that she is thinking of him! LOL

Hope  you enjoyed the little story behind my card.

Thanks for peeking,
we would love to see your creations at the
Glitter Geeks Challenge this week!

Oooooooo also I made this card on Valentine's Day so I felt it was appropriate to have some love in the air!

Happy crafting,
lots of love NJ XXXX


Friday, 10 February 2012

My Design Team Card for Glitter Geeks ...To The One I Love..

Another Friday and another Glitter Geeks Challenge.

This weeks challenge is

To The One I Love


Ingredients used to make this card...

K&Company 12x12 Teal and Gold Dots and Swirls Glitter Paper/K&Company 12x12 Teal and Floral and Letter Paper/Tim Holtz Clear Stamp - Urban Grunge/Memento Ink - Rich Cocoa/Letraset Promarker pen in Henna/Kanban greetings/Tim Holtz Distress Ink Brushed Corduroy/East of India Heart Tag and Tunnel of Love Ticket/Decorative heart ribbon/Hat pins/Vintage buttons/Papermania 8x8 kraft cardblank x 2.

How I made this card.....

Use your two 8x8 card blanks to create an easel card.

Cover with the Teal and Gold Dots paper.

Stamp 'Love' from the stamp set onto the Floral and letter paper. Tear around the edges and ink them using the ink and a sponge, hand write Happy Valentine's Day along the bottom and add a vintage button. Attach to the top right corner with foam pads.

Attach a length of ribbon down the left hand side of the card blank, looping back on itself to create three loops. Stick in the hat pins as shown. Add the East of India heart tag and the greetings.

Along the base of the easel add a length of ribbon. Add the Tunnel of Love Ticket using foam pads to create your easel stopper.Stick ribbon next to this, looping as before.

To finish glue some vintage buttons randomly in the left hand corner of the base.

I am going to give my husband this card for Valentine's Day...I like it as its a change from the usual Valentine's Day colour's of red.

I look forward to seeing your 'Love' Creations over at the Glitter Geeks this week,
have fun and happy crafting,
lots of love
NJ XXX


Friday, 3 February 2012

My DT Card for Glitter Geeks - Week 5 Pets

Hello my lovelies,

well Friday soon comes around, so of course that means we have a new challenge over at the Glitter Geeks.

The theme for this week is Pets....

here's where it's at.....


I hope you like my card for this one...


Here's how I made it.....

Ingredients....

Papermania 8x8 kraft card blank/K&Company Recycled 4x6 Double-sided mat pad/Lace cardstock/Sarah Kay Clear Stamp - Fanny's Cuddle/Feather's/Animal Print Grosgrain Ribbon/Candi/Kanban Greetings

Stamped image coloured using
Letraset Flexmarkers in shades...
Black/Sandstone/Auburn/Nutmeg/Cappuccino/Rosewood/Firebrick/Pale Pink/Blush/Tea Rose/Champagne/Sunflower/Pumpkin
Letraset Promarkers in shades...
Henna/Tan

Method...

Round the corners of the card blank. I wanted to give an animal print feel to the card blanks so using my Promarkers and Black Flexmarker I randomly drew black lines and filled in with colour.
Stamp the image onto white card and colour, cut out carefully leaving a small border around the girl and ink the edges.
Attach to a piece of lace cardstock with foam pads.
Cut out two squares of contrasting card from the mat pad, one slightly larger than the other so you have a border. Round the corners and ink the edges.
Attach the larger square first, then stick three feathers along the right hand side then attach the second square on top so its raised.
Add the image and lace cardstock.
Make a bow from the grosgrain ribbon and attach to bottom left corner of squares. Add a candi to the centre.
Add a strip of the same ribbon across the bottom right corner securing the ends underneath the card front. Take a longer piece and stick on top of the first piece but making three folds and then tuck the ends under so its neat. Add 3 candis to the centre of each fold.
Finally finish with your greetings as shown.

I hope you like this card and thank you for taking the time to read how I made it.

Myself and the rest of the Glitter Geeks Design Team would love to see your creations,

Lets see what cute pets you come up with....

have fun and a very happy crafting from me,
Lots of love
NJ XXX


Sunday, 29 January 2012

Glitter Geeks DT Card - Wk 4 Myths and Legends

Hello again everyone, I'm having a busy blogging hour and trying to catch up with some work I did before I went into hospital.

So, here we have this weeks DT card for the Glitter Geeks Challenge

Week 4 Myths and Legends


Ingredients........

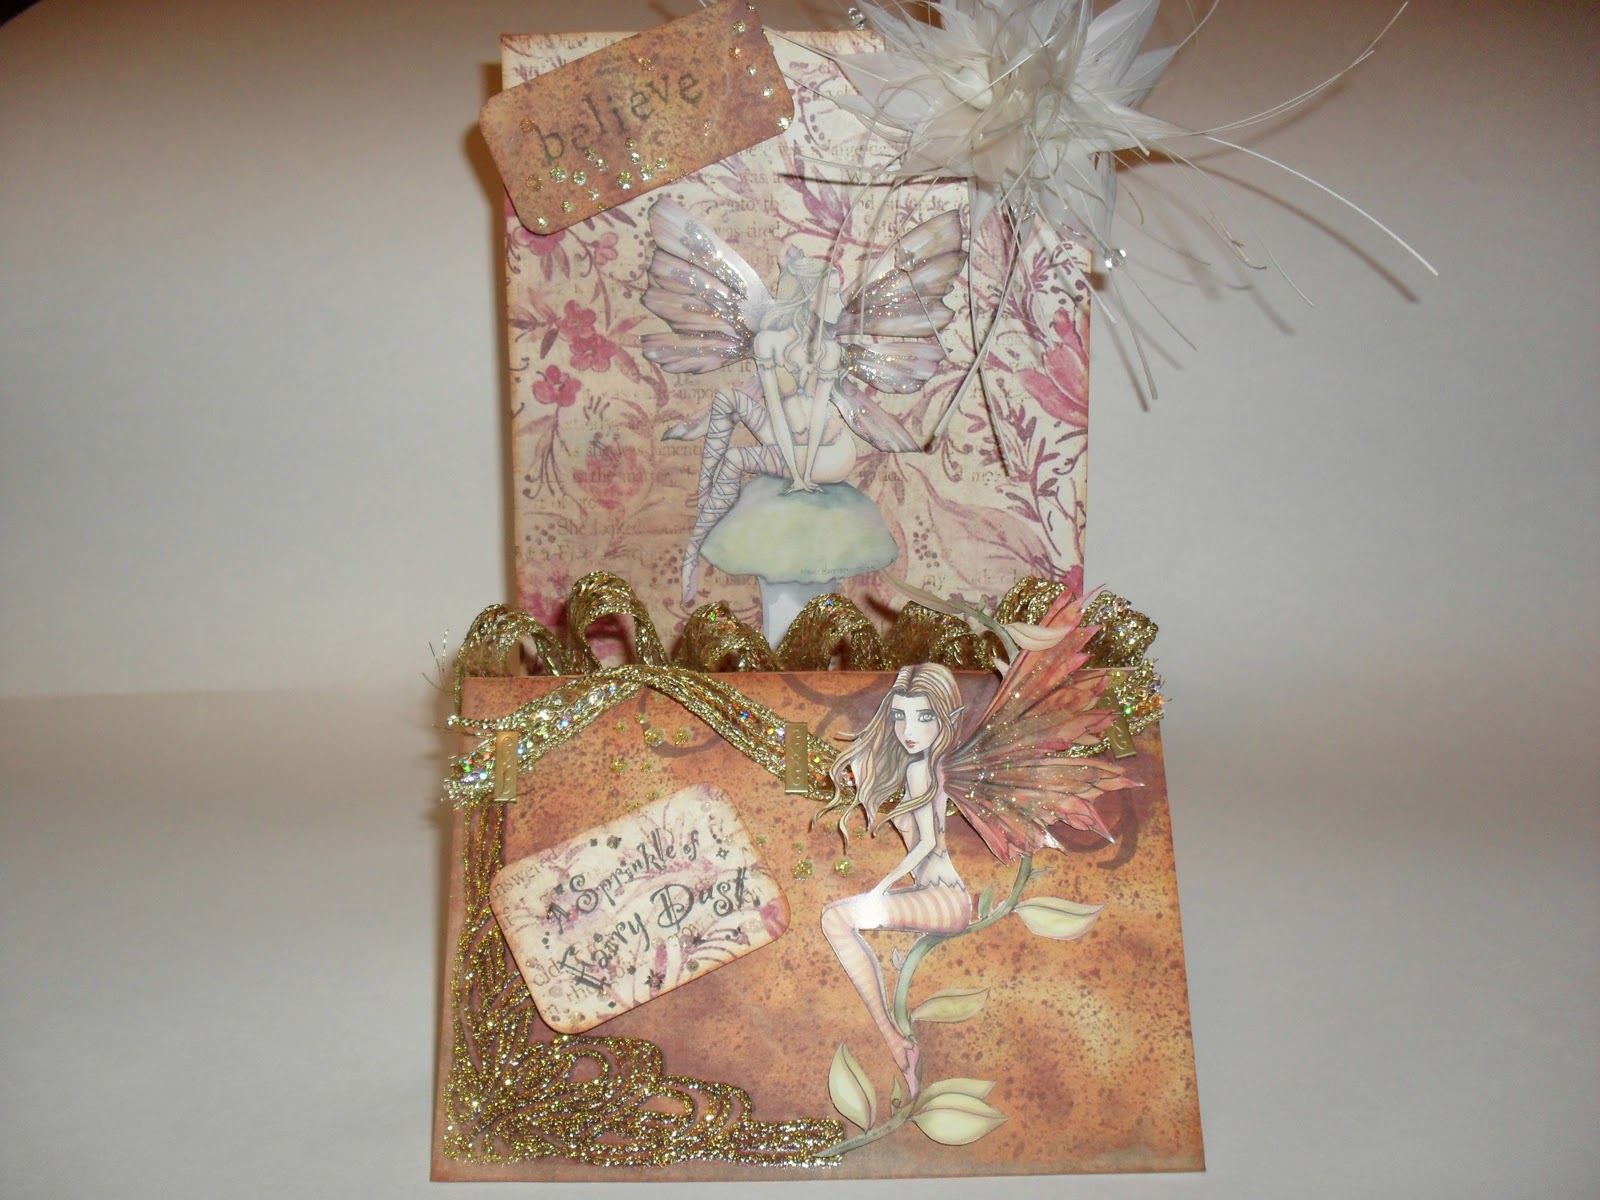
Papermania A5 Stepper card blank/DCWV Once upon A Time paperstack/ Gold sequined ribbon/Decorative staples/Tim Holtz Distress Ink Rusty Hinge/Fairy Images - Image sheets Fantasy and Fairy Art of Molly Harrison/Papermania Snag em stamp 'A Sprinkle of Fairy Dust' from the Duos stamps/Believe Stamp from the Inkadinkado Flourishes/ Stickles in Diamond/Embellishment of your choice...mine was taken off a fascinator that I didnt want any more!

How to make.......

Cover the card blank with decorative paper. Cut out two fairies from the image sheet. Stick one of them to the larger part of the card blank using foam pads. Attach the sequin ribbon to the front top of the stepper using your decorative staples. Attach the other fairy to the front right hand side using foam pads.

Stamp the two greetings onto decorative card, round the edges and then ink and attach using foam pads.

Finally use your embellishment and stick it to the top right corner of the card blank and use stickles on the fairy wings.

Thanks for looking and happy crafting,
love NJ XXXX


DT Card for Glitter Geeks Wk 3 - Two Images

My DT card for the Glitter Geeks Challenge

Wk 3 - Two Images


Please note this challenge has finished but this is the first chance I've had to blog my DT card.


I used a Belles n Whistles stamp and stamped onto ovals which I coloured using flexmarkers.
 I rounded the corners of an 8x8 kraft card blank and did faux stitches and dots with a pen.
I cut ovals out from coloured textured card and matted and layered the images.
I hand wrote the greetings and embellished with ribbon and glitter stickers.


Saturday, 14 January 2012

My DT Card for Glitter Geeks - Awareness and Causes

This is my Design Team card for this weeks Glitter Geeks Challenge

Awareness and Causes


This challenge is sponsored by


So heres what I created this week.....


Love your nurse they take time to care!

I chose to focus on the nurse image because they do a wonderful job looking after people. I know first hand about getting help from nurses through personal experience. I can't praise nurses enough....they do a stirling job and deserve recognition for the wonderful, but very hard and demanding work they do, day in day out.

I hope you will join us this week at the Glitter Geeks, myself and the rest of the Design Team would love to see what is close to your heart in
Awareness and Causes.

Happy crafting,
lots of love
NJ XXXXX

Saturday, 7 January 2012

My DT Card for Glitter Geeks - Week 1 Hand in Hand

Hello my lovelies, well I hope you are having a good start to your New Year. Why don't you put on that New Year's Resolution list to enter some blog challenges if you don't already. I think your ideal starting place would be at this weeks

Glitter Geeks Challenge - Week 1 Hand in Hand

The theme is things that go hand in hand.
So for my Design Team card I chose
Coffee and Cream


To make this card I have used:

-Belles n whistles stamp
- Flexmarkers in the colours of - dusky pink/pastel pink/nutmeg/saddle brown/auburn/sandstone/cappuccino/blue grey 1/pale citrus/pale blossom/blush/champagne
- Tim Holtz Distress Ink Brushed corduroy and sponge
- X Cut 4cm border punch
-Lace cardstock
-Papermania 8x8 cream card blank
-Butterfly flock paper by Anna Griffin
- Organza wired ribbon in brown and cream
- Vintage cream lace
-Spellbinder's Nestabilities Fleur De Lis Rectangles
- Coffee Beans
-Hat pins
- Vintage Buttons
- Cream flowers

How to make....

- Round the corners of your card blank.
- Use the decorative border punch along the edge of the right hand side card front.
- Cut a wide strip of the butterfly paper to fit the card and use the border punch along the right hand edge. Use double sided tape to stick this onto the card blank so both borders sit next to each other. Ink the edge of the card blank border using distress ink and the sponge.
- Use pinflair glue to stick the lace so it overlaps the butterfly paper.
- Cut a strip of the lace cardstock to fit along the left of the card blank making sure it overlaps the lace.
- Stamp the image onto cream cardstock and colour in.
- Cut out using the Nestibilitie
- Ink the edges with the distress ink and sponge.
- Stick to the card using pin flair so its slightly raised.
- Attach a strip of double sided tape along the bottom of the card. Overlap the cream organza ribbon onto this. Use pinflair glue to embellish with the coffee beans.
- Sponge distress ink onto the cream flowers and stick to the bottom left corner of the image. Embellish with 3 coffee beans and a vintage button.
- Use the brown organza ribbon and make a bow. Attach to the top left corner and embellish with a vintage button and a hat pin.
- Finally stick two hat pins into the edge of the lace panel.

*****
You may notice there is no greeting on this card.
Sometimes I like to leave the greeting off until I decide who or what occasion the card is for!

*****
I hope you like it and thanks for looking.
I'd love to see your creations over at the Glitter Geeks challenge this week

Have fun and happy crafting,
lots of love
NJ XXXX


Friday, 30 December 2011

My Design Team Card for Glitter Geeks -Brand Spanking New....

This is my design team card for the Glitter Geeks this week.
The theme is...
Brand Spanking New....
make something with crafty goodies
you got from Santa!


My lovely hubby bought me lots of nice crafty goodies so I used them for this card. I made a twisted easel card using 8x8 card blanks. I used Tilda paper pad to cover the card. The stamps is Belles n Whistles which I have coloured using my new Letraset Flex Marker pens. I have stamped the image using Memento Rich Cocoa ink and stamped it onto Bristol Board.
I have matted it onto decorative paper. I got bought some nesties, but as we were staying with my family...I didnt have my Grand Calibur with me...so I did the next best thing and drew round the nestie and carefully cut it out to matt the image onto.
The Spellbinders nestie is Fleur De Lis Rectangles.
I have then embellished with my new lush ribbons and bling that I know my hubby bought me from Polka Doodles

Finally I embellished with lace, decorative pins, flowers and a button that I already had in my craft stash....and as I am addicted to crafting...yes....I take my craft bag away with me!LOL

Hope you like the card and I would love to see your creations with any new crafty goodies you got for Christmas. Look forward to seeing them over at the Glitter Geeks challenge.
Thanks for looking and a very happy crafting and a very Happy New Year....
lots of love
NJ XXXX


Saturday, 24 December 2011

Design Team Project for the Glitter Geeks Challenge - Happy New Year

Well a very warm hello from me my lovelies and a wish to you all for a very Merry Christmas. I just wanted to post my latest Design Team project for the Glitter Geeks challenge.

Happy New Year


I have used a Papermania A5 stepper card blank.
The backing paper, picture and label are all printed from the Polka doodles Magical Winter 1 disc. The stamp set is the free one with Crafts Beautiful Magazine Jan 2012 Issue 236.
I used Memento ink and sponged the edges with Distress Ink peeled paint. I have embellished with buttons, ribbon, crochet flowers, candi and hat pins.

Hope you manage to find time to enter the challenge in between all the festivities. I would love to see your creations.
Have a fantastic Christmas and a Very Happy New Year,
lots of love
NJ XXX

Friday, 16 December 2011

My Glitter Geeks DT Project - Anything goes

Hello and a very happy Friday to you all!  Well over at the Glitter Geeks we have another fab challenge for you all this week.
The theme is
Anything Goes........
here is my creation.....

Hat pin holder...........


Which I made using these........


A cotton bud container and a polystyrene ball......and here's how I did it...

Cover the ball with tissue paper using double sided tape on the underside only


This is the side that will sit in the bottom of the container.

Cut a strip of decorative paper to fit round the sides of the container, ink the edges first then stick using double sided tape


Put some crumpled tissue paper in the bottom


Add pearl trim around the top edge


Cover the ball with lace using double sided tape, but make sure you stick at the bottom of the ball that will sit in the pot. If you use any adhesive anywhere else on the ball it will make it difficult to stick your pins in and out. Sit the ball into the pot


Cut out your chosen image and use pins to stand it on the ball


Wrap a length of organza ribbon around the ball, tucking any overlapping lace in. Tie a bow


Cut out three paper flowers and use stick pins to attach them to the front of the pin holder


Finally, stick in your pins


You can now store your pins in this ready to use them in your projects. When you pull one out make sure you hold the ball.


The decorative paper,image and paper flowers I have used are what I bought from the sponsor for this week

Willow Designs
I have used the Winnie downloads for this.

I hope you have enjoyed seeing how I made this
Hat pin holder
for my Design Team project for the
Glitter Geeks
Myself and the rest of the Design Team would love to see your creations, so hop over and take a look at what we've made.
Have fun and happy crafting,
lots of love NJ XX


Friday, 9 December 2011

My Design Team Card for Glitter Geeks

Here is my Design Team card for this weeks Glitter Geeks Challenge...


the theme is

Let It Snow........


I have used papers and images from the Polka doodles Christmas Boutique magazine.
Thanks for looking,
love NJ XX


Sunday, 4 December 2011

My Design Team Card for Glitter Geeks

Well over at the Glitter Geeks we have another fab challenge this week. One that I think most of you will enjoy......Decoupage. So, dig out your decoupage......if it's die-cut all the better...if it is'nt then get snipping away!LOL

Myself and the rest of the Design Team would love to see your wonderful creations, so go on give it a go.

Here's where you need to hop over to,


I used Fizzy Moon for my Design Team card this week, I just love this range!


Hope you like the card I made.
Have fun, lots of love NJ XXX


Friday, 25 November 2011

Design Team Project for the Glitter Geeks Challenge

Hello my lovelies. Well so here we are Friday night, I hope you are all looking forward to a fab week end ahead!

As you may have read in my earlier chatter I am now a Design Team member for the fabulous Glitter Geeks


This weeks challenge is to use a Digi stamp called Rudy,

so as soon as I saw him I knew exactly what I wanted to make. I decided to make a Christmas scene and I printed out 9 Rudy's, because that is how many Santa used to deliver our pressies!LOL
Can you remember all their names.........if you can't here's what they are all called...

Dancer, Dasher, Prancer, Vixen, Cupid, Comet, Blitzen, Donner and of course my favourite Rudolph the red nose reindeer.
So heres what I made........

A Christmas Scene...


To make this I used thick A4 white card for the base and covered in Christmas themed decorative paper. I inked the edges with red ink.
I printed out 9 Rudy digi stamps and coloured them in with my Polychromo pencils. I made sure I coloured 1 Rudy with a red nose and all the other's with a brown nose.
I then drew tabs at the bottom of the feet and carefully cut out the images making sure the tabs are attached to the feet. These tabs are glued down to the base, this is how the Rudy's are able to stand up. Once cut out, put aside till ready to use.
I then made a sleigh out of red card and covered with decorative paper. I used a santa head topper, and stuck it to the top of the head rest on the sleigh. I cut a bauble die cut so that it would fit just under the head making it look like Santas body. I attached the sleigh to the base with pinflair and then glued various diecuts and embellishments in and around the sleigh.
I used pinflair to then stick each of the Rudy's to the base. Make sure you have two rows of 4 and  Rudolph at the very front. Apply the glue to the tabs and press down firmly. I then used red stickles on top to blend them into the rest of the colour scheme. Add various embellishments and die cuts to the base to make a Christmassy scene. Finally I wrote the names on the fronts with a fine pen and threaded red ribbon through from the front to the back and tied in a knot so this looks like the reigns.
The great thing about this project is you can use any colour scheme you wish and vary the embellishments to suit what you may already have in your crafty stash!
I loved making this and it is now sat on show in my dining room.
I hope you join us at this weeks Glitter Geeks challenge, I would love to see you there,
have fun, happy crafting and have a lovely week end,
lots of love NJ XX